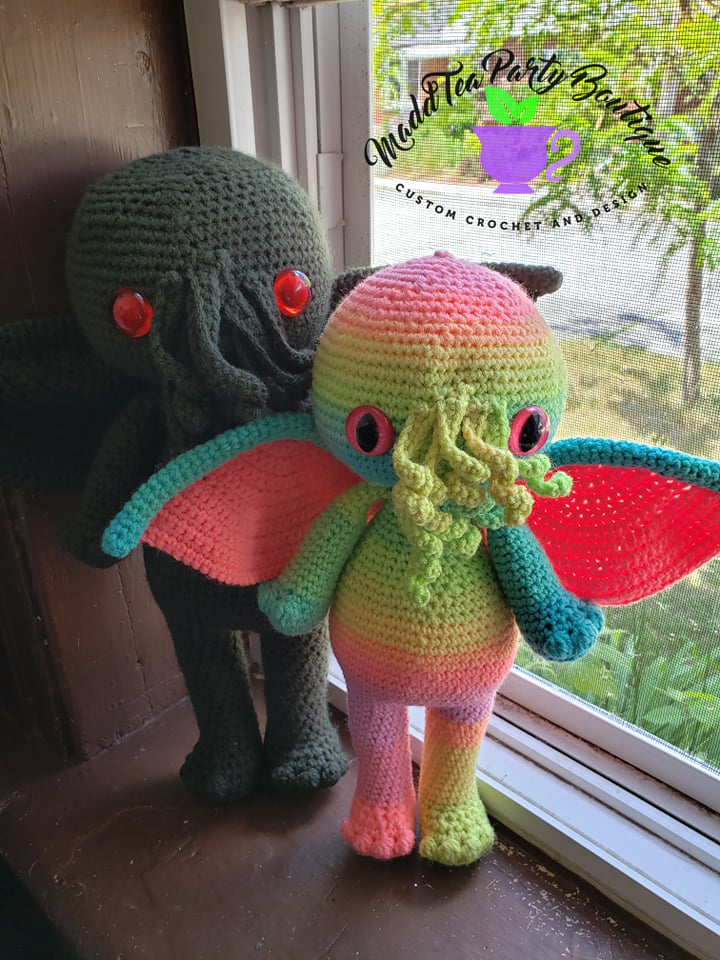
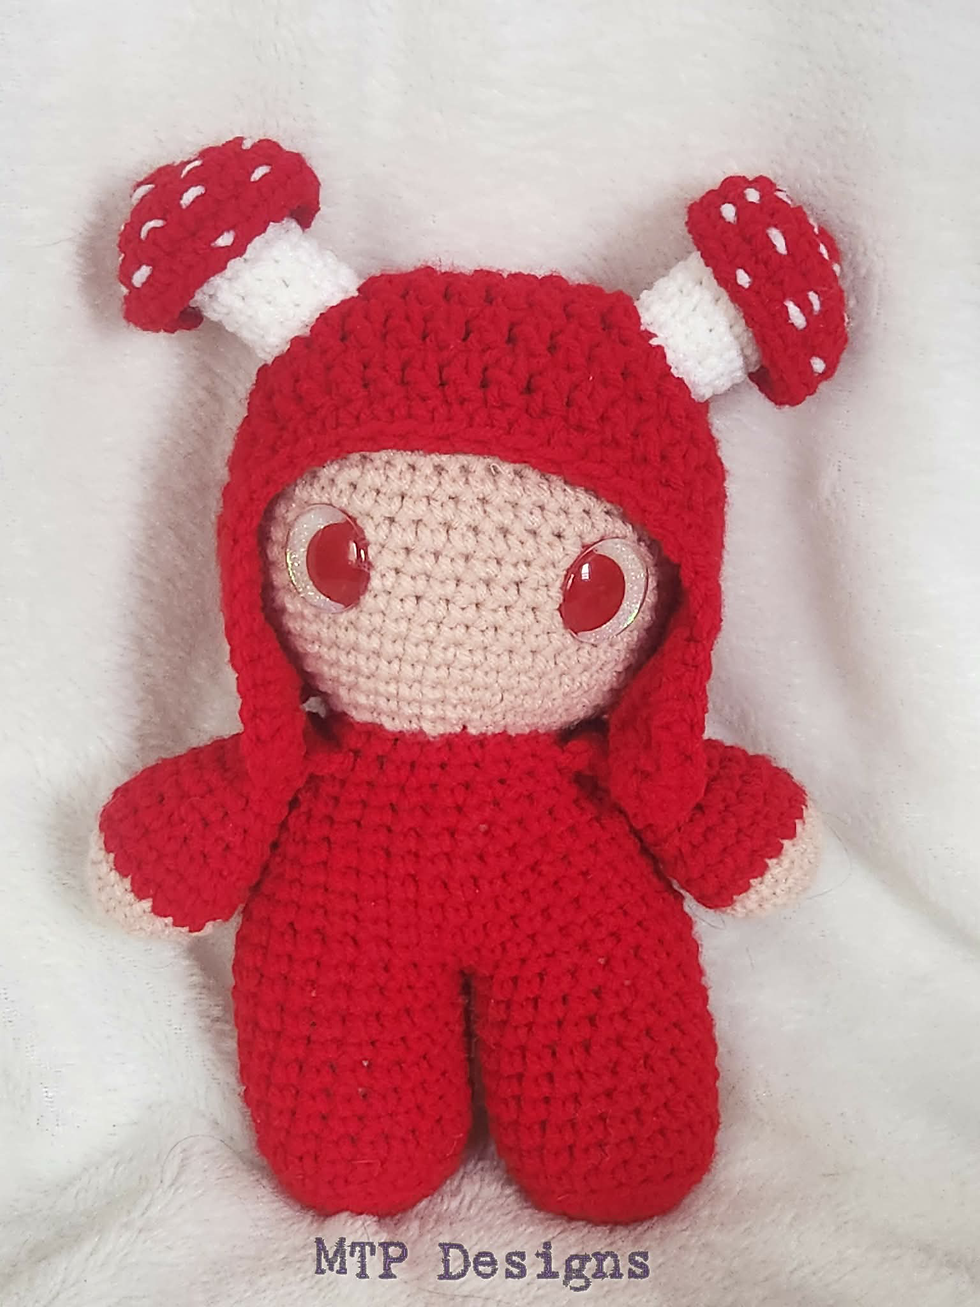
Baltor The Littlest Baphomet
- lizzieb777
- Dec 20, 2025
- 9 min read
Updated: Mar 24
Baltor the Littlest Baphomet
brought to you by MTP Designs
a subsidiary of Madd Tea Party Boutique
Copyright 2022

Materials:
#4 worsted weight yarn: approx 175 yards, E/3.5mm hook, 18mm eyes
#5 velvet yarn: approx 175 yards, G/4mm hook, crocheted eyes
#5 chunky yarn: approx 200 yards, 7/4.5mm hook, 21mm eyes
#6 blanket yarn: approx 625 yards, K/6.5mm hook, crocheted eyes
Polyfibre fill
Needle for sewing in ends and attaching pieces
Stitch Guide:
sl: slip stitch
ch: chain
sk: skip
st: stitch
yo: yarn over
mc: main colour
ac: accent colour
blo: back loop only
flo: front loop only
sc: single crochet
sc incr: single crochet increase
sc dec: single crochet decrease
hdc: half double crochet
hdc incr: half double crochet increase
hdc dec: half double crochet decrease
dc: double crochet
dc incr: double crochet increase
dc dec: double crochet decrease
tc: triple crochet
tc incr: triple crochet increase
tc dec: triple crochet decrease
Special Instructions: I suggest using the invisible dec wherever it says in the pattern to do a dec,it helps with the overall look of the item, and helps to reduce stuffing showing through on those rows/rounds
Gauge is not important with this item, changing the hook or yarn size will simply change the size of the finished piece, just make sure you use the appropriate size hook for your yarn
When making this in blanket yarn it is helpful to skip the first round and go
straight to the second round instead on: arms, legs and horns
Meet the Maker: Hi! I'm Lizzie Livett-Buchanan, the strange and unusual mind behind the strange and unusual designs from MTP Designs. I love to create the weird, the unusual, and sometimes even the macabre! I hope you enjoy making this as much as I enjoyed
writing it! I love to see what people come up with working with my patterns, so please join us in my group on facebook!!
Arms: (make two)
in ac
Start with a magic circle, or ch 3 with a sl to join, however you feel comfortable starting on the round
Round 1: 6 sc in the circle (6)
Round 2: 2 sc, 1 sc incr, repeat around (8)
Round 3: 3 sc, 1 sc incr, repeat around (10)
change to mc
Round 4 – 8: 1 sc, repeat around (10)
stuff arm lightly here, leave remaining rounds unfilled
Round 9 – 10: 1 sc, repeat around (10)
Round 11: fold so both sides are touching and sc through both to close x5 (5)
finish off

Legs: (make two)
in ac
Start with a magic circle, or ch 3 with a sl to join, however you feel comfortable starting on the round
stuff firmly as you go
Round 1: 6 sc in the circle (6)
Round 2: 1 sc incr, repeat around (12)
Round 3: blo: 1 sc, 1 sc incr, repeat around (18)
Round 4: 1 sc, repeat around (18)
change to mc
Round 5: 1 sc, repeat around (18)
Round 6: 4 sc, 1 sc dec, repeat around (15)
Round 7: 1 sc, repeat around (15)
Round 8: 3 sc, 1 sc dec, repeat around (12)
Round 9 – 10: 1 sc, repeat around (12)
here you will finish off the first leg, leaving a longer tail to sew closed the hole that will be left behind when you attach the legs, do NOT finish off the second leg, instead continue on to the next set of instructions:
Round 11: ch 3, sc into the first st on the first leg, and the next 11, 3 sc into the back bump of the
ch 3, sc x12 around the second leg, 3 sc into the front loops of the ch 3 (30)

Round 12: 4 sc, 1 sc incr, repeat around (36)
sew hole closed
stuff firmly as you go
Body:
Round 13 – 17: 1 sc, repeat around (36)
Round 18: 4 sc, 1 sc dec, repeat around (30)
Round 19: 1 sc, repeat around (30)
Round 20: 8 sc, 1 sc dec, repeat around (27)
Round 21: 7 sc, 1 sc dec, repeat around (24)
Round 22: 2 sc, 1 sc dec, repeat around (18)

Round 23: attaching the arms: 4 sc, hold arm up to your work and sc through both pieces x5, 4 sc, hold second arm up to your work and sc through both x5 (18)

Alternate Round 23: 1 sc, repeat around (18)
Round 24: 4 sc, 1 sc dec, repeat around (15)
Round 25: 1 sc, repeat around (15)
Head:
Round 26: 1 sc incr, repeat around (30)
Round 27: 1 sc, 1 sc incr, repeat around (45)
Round 28: 4 sc, 1 sc incr, repeat around (54)
Round 29 – 38: 1 sc, repeat around (54)
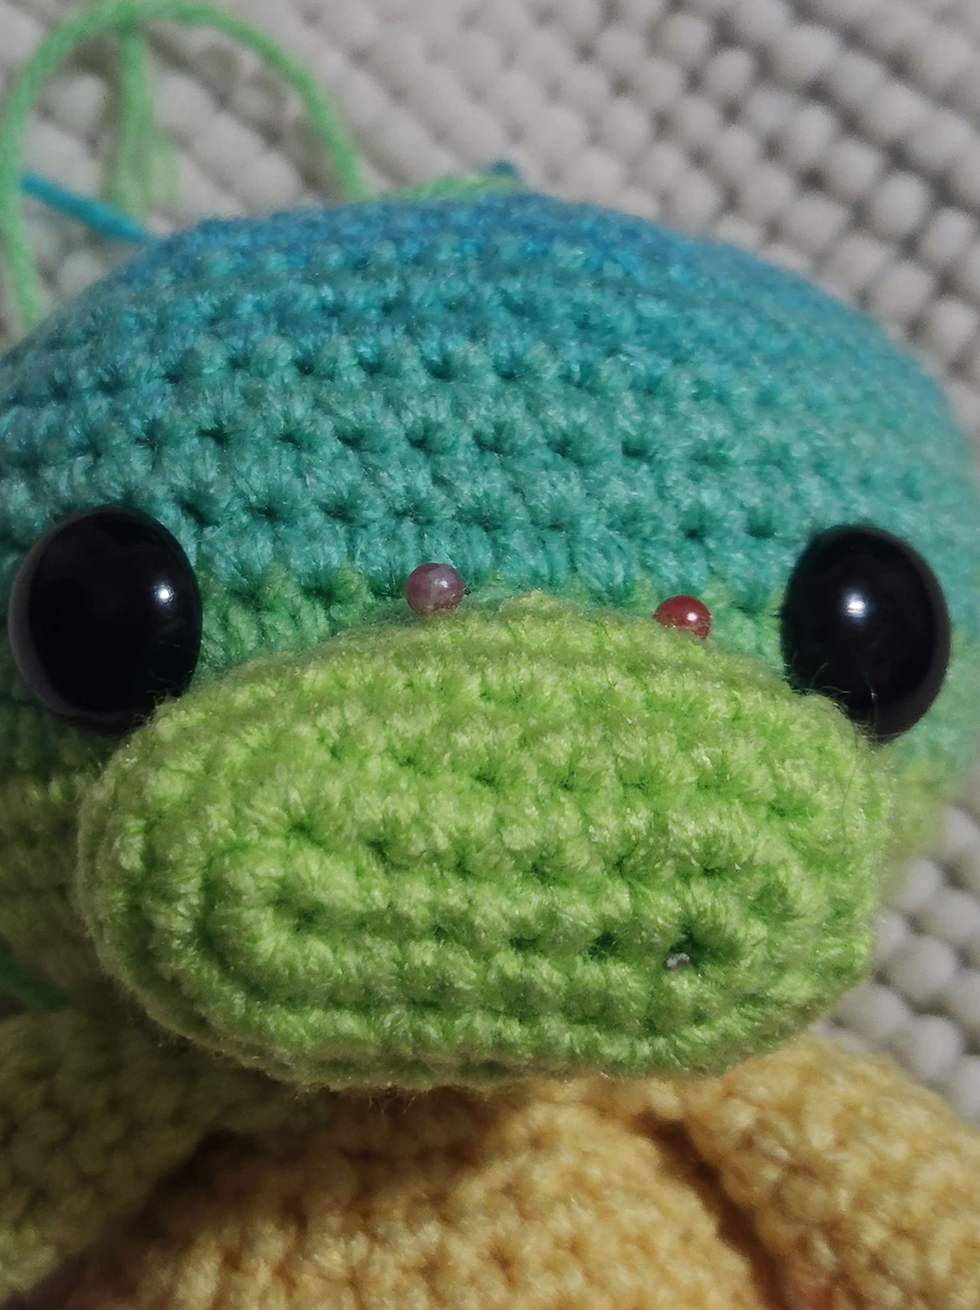
place eyes in between rounds 33/34 with roughly 8 st showing between
Round 39: 7 sc, 1 sc dec, repeat around (48)
Round 40: 6 sc, 1 sc dec, repeat around (42)
Round 41: 5 sc, 1 sc dec, repeat around (36)
Round 42: 4 sc, 1 sc dec, repeat around (30)
Round 43: 3 sc, 1 sc dec, repeat around (24)
Round 44: 2 sc, 1 sc dec, repeat around (18)
Round 45: 1 sc, 1 sc dec, repeat around (12)
Round 46: 1 sc dec, repeat around (6)
finish off and weave in ends

Muzzle:
ch 7
Round 1: 1 sc incr in 2nd ch from hook, 4 sc, 4 sc in the last ch, turn and work down the other side,
4 sc, 1 sc incr in the last ch (16)
Round 2: 2 sc incr, 4 sc, 4 sc incr, 4 sc, 2 sc incr (24)
Round 3: 1 sc dec, 8 sc, 2 sc dec, 8 sc, 1 sc dec (20)
Round 4: 1 sc, repeat around (20)
Round 5: 1 sc dec, 6 sc, 2 sc dec, 6 sc, 1 sc dec (16)
Round 6: 1 sc, repeat around (16)
finish off with a long tail to sew on to the head

Horns: (make two)
in ac
Start with a magic circle, or ch 3 with a sl to join, however you feel comfortable starting on the round
stuff firmly as you go
Round 1: 4 sc in the circle (4)
Round 2: 1 sc, 1 sc incr, repeat around (6)
Round 3: 1 sc, repeat around (6)
Round 4: 2 sc, 1 sc incr, repeat around (8)
Round 5 – 6: 1 sc, repeat around (8)
Round 7 – 8: 4 hdc, 4 sc (8)
Round 9: 3 sc, 1 sc incr, repeat around (10)
Round 10 – 11: 2 sc, 4 hdc, 4 sc (10)
Round 12: 4 sc, 1 sc incr, repeat around (12)
Round 13: 1 sc, repeat around, join with a sl (12)
finish off with a long tail to sew to the head

Ears: (make two)
make 4: 2 in ac, 2 in mc
start in ac
Start with a magic circle, or ch 3 with a sl to join, however you feel comfortable starting on the round
Round 1: 6 sc in the circle (6)
Round 2: 1 sc incr, repeat around (12)
Round 3: 1 sc, 1 sc incr, repeat around (18)
Round 4: 2 sc, 1 sc incr, repeat around (24)
finish off first one, but not second, instead continue on to the next instructions to join the two pieces
Round 5: hold the two pieces together, and sc x24 around both pieces to attach, fold so the two edges are touching, sc through both st to join x3, 1 sl (3)
finish off with a long tail to sew to the head


Tail:
** do not stuff
Start with a magic circle, or ch 3 with a sl to join, however you feel comfortable starting on the round
Round 1: 4 sc in the circle (4)
Round 2: 1 sc, 1 sc incr, repeat around (6)
Round 3 – 7: 1 sc, repeat around (6)
finish off the first one, but not the second, instead continue on to the next set of instructions to attach
Round 8: sc into the first st on the first piece, and the next 5, sc x6 around the second piece (12)
Round 9: 2 sc, 1 sc dec, repeat around (9)
Round 10: 1 sc, 1 sc dec, repeat around (6)
Round 11 – 30: 1 sc, repeat around (6)
Round 31: fold so both sides are touching and sc through both sides to close x3 (3)
finish off with a long tail to sew to the body


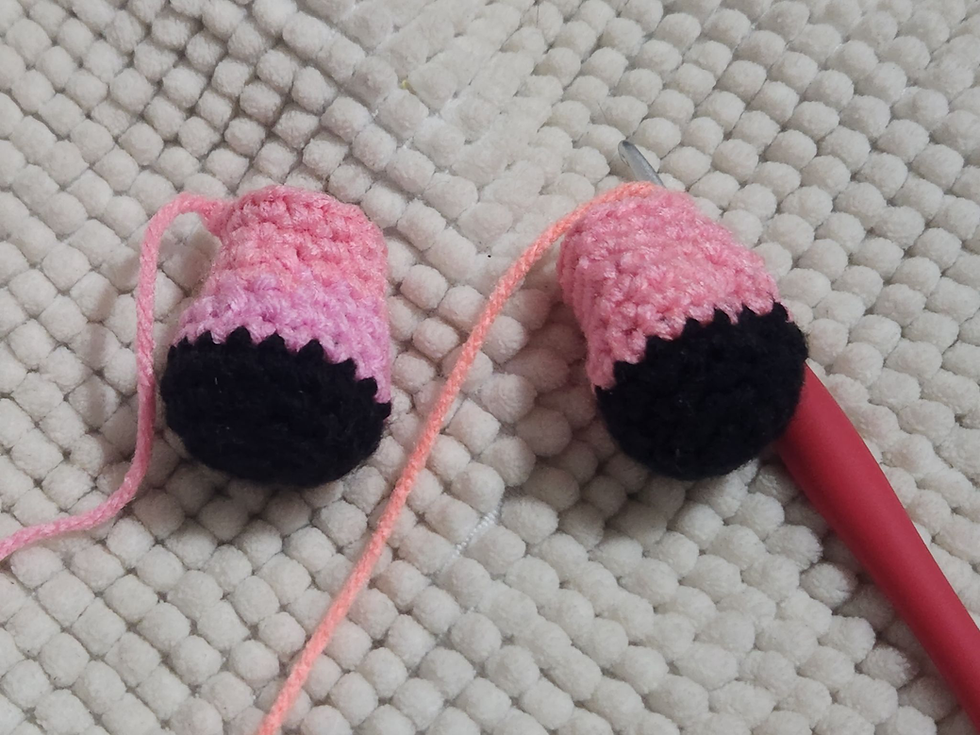
Eyes for Worsted Weight: (make two)
Start with a magic circle, or ch 3 with a sl to join, however you feel comfortable starting on the round
Round 1: 6 sc in the circle (6)
Round 2: 2 sc, 1 sc incr, repeat around, sl to join (8)
finish off with a long tail to sew to the head

Eyelids: (make two)
Start with a magic circle, or ch 3 with a sl to join, however you feel comfortable starting on the round
Row 1: 6 sc in the circle, turn (6)
Row 2: ch 1, 1 sc, 1 sc incr, 2 sc, 1 sc incr, 1 sc, turn (8)
Row 3: ch 1, 1 sc, 2 sc incr, 2 sc, 2 sc incr, 1 sc, turn (12)
finish off with a long tail to sew to the head
if your eyelid is not quite big enough for your liking, carry on instead to row 4, if it is the size you want it to be, then continue on to row 5 and skip row 4
Row 4: ch 1, 5 sc, 2 sc incr, 5 sc (14)
Row 5: ch 1, sc across the bottom x6 (6)
finish off with a long tail to sew to the head

Eyes for Velvet Yarn: (make two)
using your 3.5mm hook:
Start with a magic circle, or ch 3 with a sl to join, however you feel comfortable starting on the round
Round 1: 6 sc in the circle (6)
Round 2: 1 sc incr, repeat around (12)
Round 3: 1 sc, 1 sc incr, repeat around, sl to join (18)
finish off with a long tail to sew to the head
Eyes for Blanket Yarn: (make two)
using your 3.5mm hook:
Start with a magic circle, or ch 3 with a sl to join, however you feel comfortable starting on the round
Round 1: 6 hdc in the circle (6)
Round 2: 1 hdc incr, repeat around (12)
Round 3: 1 hdc, 1 hdc incr, repeat around (18)
Round 4: 2 hdc, 1 hdc incr, repeat around, sl to join (24)
finish off with a long tail to sew to the head
Large Eye Dot: (make two)
with your D/3.25mm hook
Start with a magic circle, or ch 3 with a sl to join, however you feel comfortable starting on the round
Round 1: 8 hdc in the circle, join with a sl (8)
finish off with a long tail to sew to the eye
Small Eye Dots: (make four)
with your D/3.25mm hook
Start with a magic circle, or ch 3 with a sl to join, however you feel comfortable starting on the round
Round 1: 6 sc in the circle, join with a sl (6)
finish off with a long tail to sew to the eye


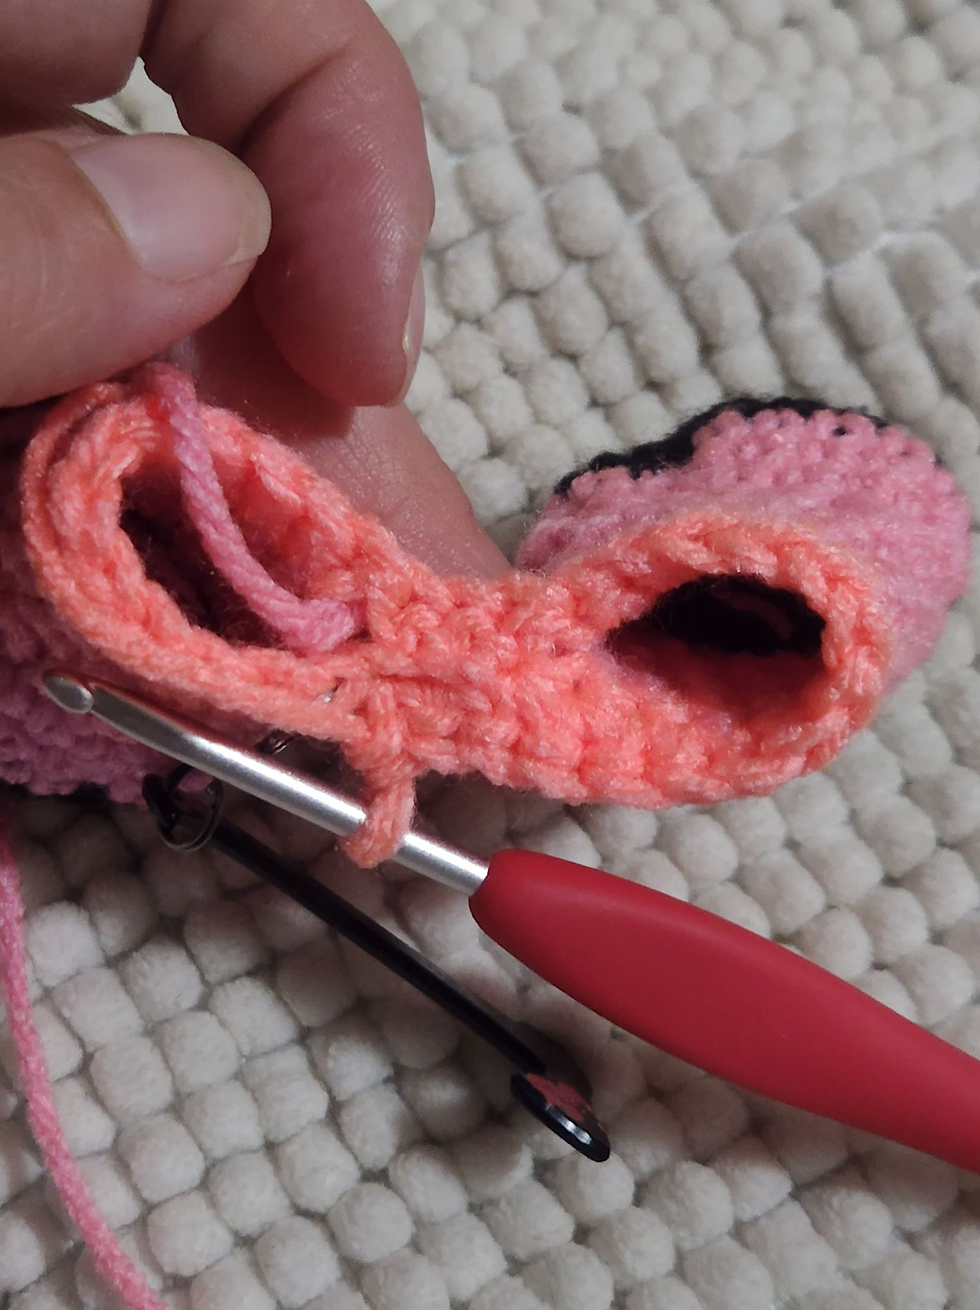
Wings: (make two)
make 4 pieces – if you want to make the wings two toned, as pictured below, do your first piece in the ac and the second piece in the mc so you can sc around in it
ch 7
Row 1: 1 sc in the 2nd ch from hook and next 5, turn (6)
Row 2: ch 1, 1 sc incr, 4 sc, 1 sc incr, turn (8)
Row 3: ch 1, 1 sc, 1 sc incr, 4 sc, 1 sc incr, 1 sc, turn (10)
Row 4: ch 1, 2 sc incr, 2 sc, 2 sc incr, 2 sc, 2 sc incr, turn (16)
Row 5: ch 1, 7 sc, 2 sc incr, 7 sc, turn (18)
Row 6 – 7: ch 1, 18 sc, turn (18)
Row 8: ch 1, 1 sc, 1 sc incr, 2 sc, 1 sc incr, 3 sc, 3 sc incr, 3 sc, 1 sc incr, 2 sc, 1 sc incr (25)
Row 9 – 10: ch 1, 25 sc, turn (25)
finish off first piece, but not second, instead continue on to the following instructions:
Row 11: ch 1, hold two pieces together so they're flush and sc through both pieces to join,
x25 along the top, x11 down side, x6 along bottom, x11 up side, sl to join (57)
Here you will take both of your finished peices, and hold the bottoms together, attach your yarn to the first st in the 6sc, sc x6 across the bottom to attach, finish off with a long tail to sew to the back (6)
*** if when you sc around the piece, you end up with a different amount of stitches, it's fine, just do the same number on both pieces, and if you want to make more than 6 sc across the bottoms to join that is perfectly fine as well ***


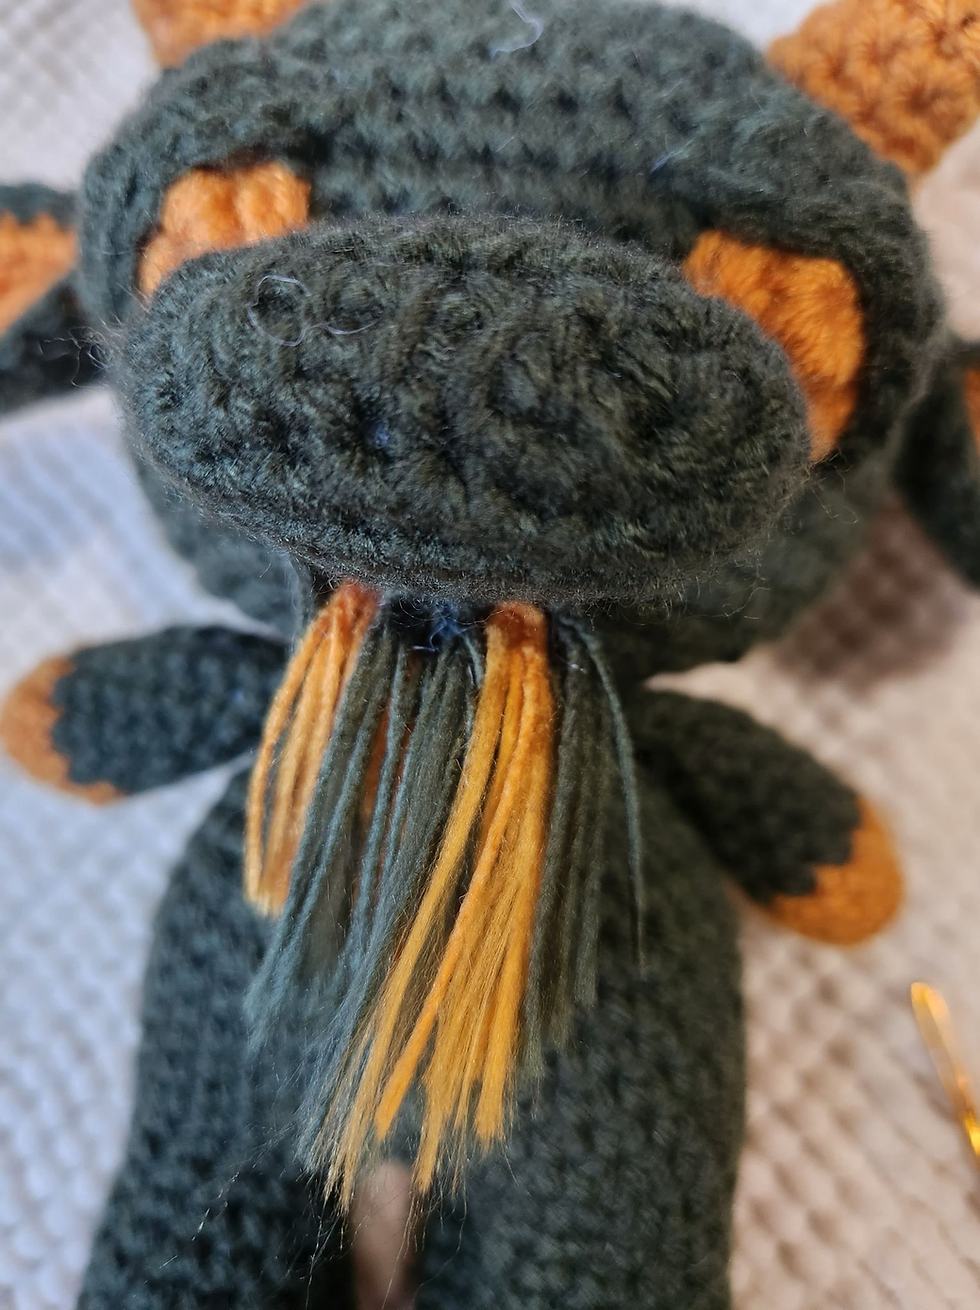
Beard:
For the beard, you will cut several pieces of yarn, around 5-6” in length each, tie them to the chin where you would like the beard to be, then separate the strands from each other and brush them out with a pet brush, then use a hair straightener on a very low setting to straighten out the beard

Assembly:
Arms: attach to round 23
Muzzle: attach between the eyes so the top is touching round 34
Horns: attach to the top of the head, so the middle is touching round 43/44
Ears: attach just below the horns so they face forward, roughly at round 38
Eyes: attach to the head so the top is touching round 44/45, about 8 st showing between
Tail: attach to round 14 on the back
Wings: attach to the back so they're sitting above the tail and below the head


Copyright 2022 MTP: Designs, a subsidiary of Madd Tea Party Boutique, do not share or sell this pattern either in part or as a whole. You are free to make any items you wish from this pattern either for personal use or for sale, just give credit for pattern back to MTP: Designs and/or Madd Tea Party Boutique.
I also have a group specifically for my patterns, and getting help and sharing your creations: